Thursday 7 January 2010

The making of my Wrapping Paper


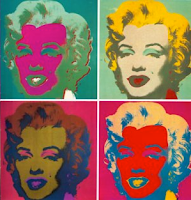
As most people know, Andy Warhol is famous for his silk screen print of Marlin Monroe. I thought this would be an ideal aspect to use for my wrapping paper.


In order to create my wrapping paper, i wanted to use the same idea as Warhol, however, because Marlin Monroe was high in the ranks of fame and glamour in Warhol's day and age, i thought to myself about changing my character, that would relate to fame and glamour in my generation; so i thought to create one of Britney Spears.
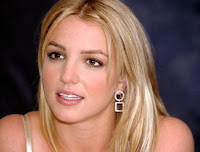


The first thing i had to do is gain a picture of her, from the net.
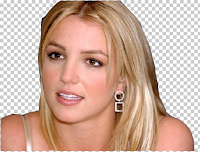


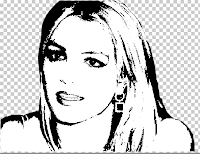
 Then using the magnetic lassoo tool, i traced around Britney's outline, to separate her from the background and just giving her outline and features. Note: I had to create a new layer and copy the image into this.


Then making sure my new layer was active, i went through the following instructions, demonstrated in the next screen shots.
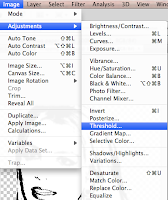


The reason for creating this black and white feature, is to make the next job alot easier. This is to then lassoo out the parts of her body that i wanted to, first put in new layers, and then colour in to give Warhol's famous effect.


These pictures either side, show you the process, of lassoo-ing Britney's face, and copying and paste it into a new layer. I had to do this three times on three different features of the body (Face, Lower Body and Hair).


Once i had created all three layer, it was time to add some colour! Here is the way i did it.


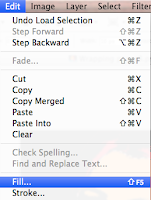
 Making sure i clicked on the face thumbnail, whilst holding Apple, enabled me directly select just the face of the over all pictures. I then went to edit and fill, to give some colour options. (In this incidence i was                                                       colouring her face, however, if i was doing                                                         another feature,  i would make sure i would                                                         apple click that part of the body).


Then making sure i had clicked colour in the Contents, and Use items, i had to select a colour, i wanted to fill the feature in with (i.e orange).


 As you can see now, the Face thembnail has changed to Orange.


After doing these steps on every feature it gave me something a little like this. After creating the whole portrait, i would save it as a file name (i.e. brit wrapping paper one). Then i would change all the colours over, and then go save as, and change it to a new file name, allowing me to have all my portraits in different files. The next step was to insert all the files into one, to give his overall effect, with loads of different portraits, in different colours. Then lastly, i had to save the document, and then re-save it as a JPEG format, to take to the printed, to print on a large bit of paper to wrap around my box.


 End result..... (AFTER A LOT OF STRESSING, AND ONE LATE NIGHT, IT WAS ALL DONE! :))


Wednesday 6 January 2010

Designing my poster.


 Yesterday, i came across one of Andy Warhol's famous poster on the baseball team "Reds". The poster, was to advertise the team and sport, and Warhol, had a passion for the sport. The picture consists of one of the players from the team "Pete Rose", duplicated four times, in different corners, with different colour backgrounds. Also the badge of the team is in every bottom corner of the picture, along with the players name.

Now it was time to think of a simular design i could make, with a different  badge, logo and character. I then thought, what do i have a passion for, which is motorbikes, and then i decided, to base my poster on my idol "Valentino Rossi", who rides in the Moto GP, which i watch every sunday.


First, i got a decent resolution picture of him off the net.


I then had to separate the bike and him from the background, which i decided to use photoshop for.


This is the image placed in photoshop. After using the magnetic lassoo tool, to trace around the character, to separate the bit i need and did not (background).


This image is of the character, placed in a new layer, with out his background. Simply just copied the selected lassoo into new layer (Apple J).


 This pictures show me creating the background squares, the titles, that will be placed next to the rider and his name.


 All i simply did here, is create the boxes, using the rectangle tool (U). Then using the paint bucket tool to fill in the colour. Then more rectangle tools to create the black background that surrounds the name of the team in the moto gp series (Yamaha). Then lastly using the text tool (T) to create the titles of the team and the name of the rider (Valentino Rossi, Yamaha).


After positioning of the above picture, all i had to do is place the rider, and then the badge.
 I had to find the Yamaha badge, and import it into Photoshop. Picture below shows this; Note that this is the genuine colour of the badge. 


 Here you see that i have used the magic wand tool to auto-select the background of the badge, where you can see the "running ants" indicating what i have selected. Then i simply chose the colour of the backgrounds i have in the poster, using the eye dropper tool, then clicking on the background of the badge, with the paintbucket tool.

Lastly, after colouring in the badge, four different colours, i just had to place them onto the poster.


Giving me the end result as.......

 Lastly all i have to do is take a JPEG format of this file, to my local printing shop "Wasps Printers" and print this file onto an A3 size page, to give it that extra poster effect.

Monday 4 January 2010

Box Development

Yesterday, I started to create and build my box.


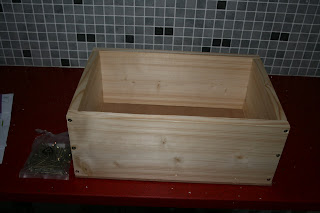
 As you can see i have created all my sides and bottom of the box. I did this by cutting my wood, with an electric saw, filing down all edges to give smoothness. Then i had to drill holes in the corners to screw all the box together. Now all i have to do is cut the top of my box to size, and place hinges on it, to enable opening and closing of the box. Then finally spray paint the red band all the way round the box, using masking tape to block areas that I don't want to colour, and use stencils to show writing on the box in the specific places.