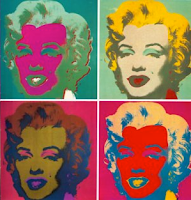
As most people know, Andy Warhol is famous for his silk screen print of Marlin Monroe. I thought this would be an ideal aspect to use for my wrapping paper.
In order to create my wrapping paper, i wanted to use the same idea as Warhol, however, because Marlin Monroe was high in the ranks of fame and glamour in Warhol's day and age, i thought to myself about changing my character, that would relate to fame and glamour in my generation; so i thought to create one of Britney Spears.
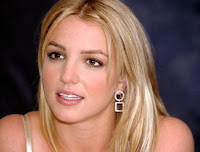
The first thing i had to do is gain a picture of her, from the net.
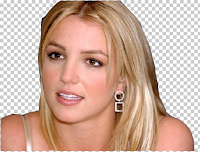
Then using the magnetic lassoo tool, i traced around Britney's outline, to separate her from the background and just giving her outline and features. Note: I had to create a new layer and copy the image into this.
Then making sure my new layer was active, i went through the following instructions, demonstrated in the next screen shots.
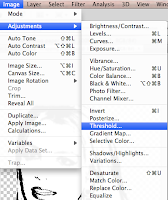

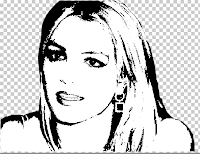
The reason for creating this black and white feature, is to make the next job alot easier. This is to then lassoo out the parts of her body that i wanted to, first put in new layers, and then colour in to give Warhol's famous effect.
 These pictures either side, show you the process, of lassoo-ing Britney's face, and copying and paste it into a new layer. I had to do this three times on three different features of the body (Face, Lower Body and Hair).
Once i had created all three layer, it was time to add some colour! Here is the way i did it.

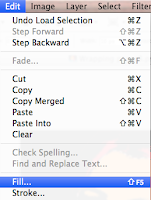
Making sure i clicked on the face thumbnail, whilst holding Apple, enabled me directly select just the face of the over all pictures. I then went to edit and fill, to give some colour options. (In this incidence i was colouring her face, however, if i was doing another feature, i would make sure i would apple click that part of the body).


Then making sure i had clicked colour in the Contents, and Use items, i had to select a colour, i wanted to fill the feature in with (i.e orange).
As you can see now, the Face thembnail has changed to Orange.
After doing these steps on every feature it gave me something a little like this. After creating the whole portrait, i would save it as a file name (i.e. brit wrapping paper one). Then i would change all the colours over, and then go save as, and change it to a new file name, allowing me to have all my portraits in different files. The next step was to insert all the files into one, to give his overall effect, with loads of different portraits, in different colours. Then lastly, i had to save the document, and then re-save it as a JPEG format, to take to the printed, to print on a large bit of paper to wrap around my box.
End result..... (AFTER A LOT OF STRESSING, AND ONE LATE NIGHT, IT WAS ALL DONE! :))


No comments:
Post a Comment